


how to upgrade Forescout Temporary enterprise manager
First we need to take backup of EM device --
find the below step to take backup of Forescout--
To back up the permanent Enterprise Manager
1- From the Console, select Options from the Tools menu.
2- Select CounterACT Devices and then select the permanent Enterprise Manager from the CounterACT Devices pane.
3- Select Backup. The default backup file name is comprised of the device name, version number, date, and time of the backup.

If the cloned virtual Enterprise Manager interface fails. Delete the file /etc/udev/rules.d/70-persistent-net.rules and restart the Enterprise Manager
Take backup of Application also -
It is recommended to back up your Appliances before upgrading them. If there is a problem after the upgrade you can restore your Appliances to the previous version from the backup
to take backup of application follow below step --
1- To back up an Appliance: 1. From the Console, select Options from the Tools menu.
2- Select CounterACT Devices and then select the Appliance that you want to back up from the CounterACT Devices pane.
3- Select Backup. The default backup file name is comprised of the device name, version number, date, and time of the backup.

Install the Backed Up Settings on the Temporary Enterprise Manager --
The temporary Enterprise Manager will have the same Appliance assignments as the permanent Enterprise Manager. The Appliance assignments ensure that the temporary Enterprise Manager will later be able to automatically manage the required Appliances. The temporary Enterprise Manager will also have the same IP address and name as the permanent Enterprise Manager
To install Forescout on the temporary Enterprise Manager with permanent Enterprise Manager settings:
1- Install the current version of your Forescout system on the temporary Enterprise Manager using a prepared DVD. Do not configure it.
2- Copy the backup file of the permanent Enterprise Manager to an external USB device.
3- Power on the temporary Enterprise Manager

Type 2 to restore config

until the boot process. When booting the temporary Enterprise Manager for the first time after the restore, stop the boot process using the GRUB menu interface
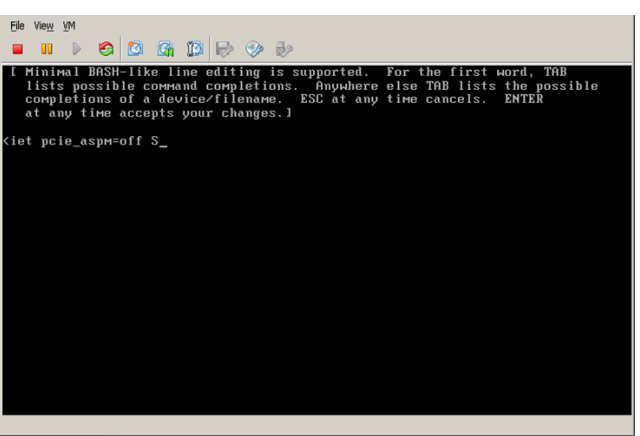
Enter the Single mode using GRUB. During the boot process, press any key to enter the GRUB menu interface screen.
 |
4 - Use the up or down arrow keys to select the kernel to boot (single selection in the screen above) and then type e to edit the commands before booting

Press Enter to return to the previous screen
Type b to boot the temporary node.
7- .Change the temporary Enterprise Manager IP address by using: fstool netconfig. Do not restart the network or the service.
8 - .Change the temporary Enterprise Manager name using: fstool netconfig -h some-temporary-name. A new host name will be created the after reboot


No comments